

|
|
||||
|
Tile
Over Laminate Surface |
||
 |
|
 |
|
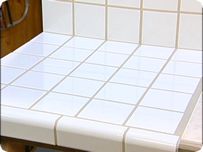
As a Master tile setter, Armen had always felt guilty whenever he had to remove an existing countertop and then discard it, so he challenged himself was to find a way to get mortar to stick to a laminate surface. After a process of trial and error, he was successful! | ||
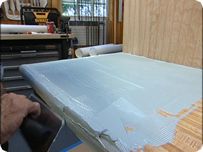 |
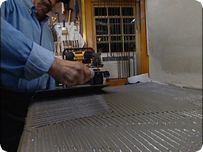
He starts by applying TAVY Thin-Skin #007 Glue directly to the laminate surface, using an eighth-inch, V-notch saw tooth trowel. The trowel helps to provide the necessary amount of glue without making a mess. This first layer of adhesive is not used for attaching the tile but instead, to attach a sheet of special fiberglass reinforced paper called TAVY Thin-Skin. | |
|
It is generally known that the laminate surface of the countertop does
not work well with mortar - it just won't stick. But with this new system,
the glue sticks to the laminate, the paper sticks to the glue, and the
mortar sticks to the paper.
|
 |
|
 |
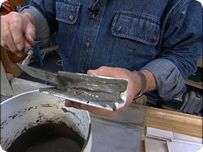
A wide putty knife is used to smooth out the surface of the TAVY Thin-Skin Underlayment and remove any air bubbles trapped under the paper. | |
All of this results in a surface that is ready for tile! You don't even have to wait for the glue to dry. |
||
|
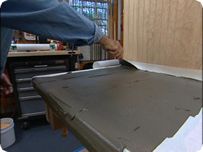
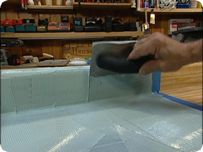
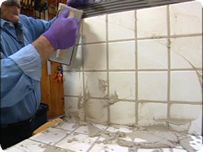
Once the TAVY Thin-Skin Underlayment is in place, spread a thin layer of mortar onto the paper surface to acclimate the paper to the mortar.
|
 |
|
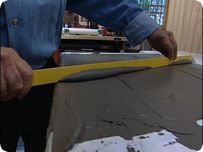 |
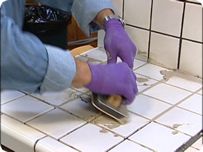
Many laminate countertops have a slightly raised lip on the front edge to keep water from spilling off. If this is the case, you will need to create a perfectly flat surface for the tile. To do this, apply additional mortar to the front third of the countertop and then use a straight edge to screed off the excess. | |
|
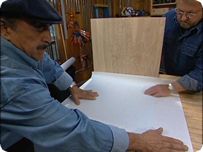
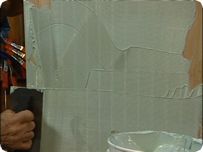
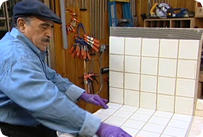
To test this underlayment system on more than one surface, Ron set up a piece of bead board to serve as a back wall. Once again TAVY Thin-Skin #007 Glue was applied directly to the surface and then paper was laid on top, bridging and concealing the grooves of the bead board underneath.
|
 |
|
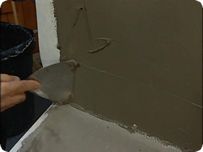 |
As
with the countertop, a skim coat of mortar was applied to the wall.
|
|
|
A laminated countertop backsplash is prepped in the same way, by first applying TAVY Thin-Skin #007 Glue, and then the paper.
|
 |
|
| In essence, Armen's system converts a plastic laminate countertop into a concrete-like surface. After the thin layer of mortar has set, the process is just the same as with any tiling surface. | ||
 |
Apply the thin set mortar and then rake the surface with a notched trowel. The ridges left by the trowel ensure that the mortar is distributed evenly across the surface and with a uniform thickness. | |
|
Apply
additional mortar to the inside corners of the bull nose tiles that line
the countertop. This process, called buttering, eliminates any voids underneath
the tile and reduces the likelihood that the edge tiles might crack if
they are bumped or struck.
|
 |
|
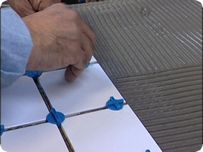 |
TAVY Two-Sided Spacers are inserted between the tiles. Armen has come up with his own version of the tile spacer, which has a unique disk shape that allows the spacer sitting on top of the tile, making it easier to remove. One side of the spacer is used on straight runs and the other is designed for the corners where the joints intersect. | |
One of the biggest causes for tile failure is when the installer tries to cover too large of an area at one time. This can allow the thin set to start drying before the tiles are laid on top. You can greatly reduce this potential risk by mixing small batches of mortar, and working a smaller section at a time. |
||
|
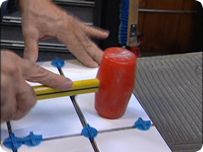
Tapping
the tiles with a rubber or plastic mallet helps them settle into place
and bond with the mortar.
TAVY Two-Sided Spacers keep the joints in alignment and at a consistent width. |
 |
|
|
Once the deck tiles are in place, Armen applies mortar to the back wall, and then begins at the bottom and stacks the tile, one row on top of the other. TAVY Two-Sided Spacers once again keep the joints uniform and prevent the tiles from slipping downward. |
||
|
Armen mixes his grout slightly on the dry side and then he uses a fair amount of pressure to force the grout to the bottom of the joints, filling each one completely. |
 |
|
 |
Then, holding the rubber float up on edge, he removes the excess grout from the surface. | |
Armen then cleans the face of the tile with a sponge dampened with water. |
||
|
He
repeats this process several times, changing the water frequently, before
the surface haze is completely removed.
|
 |
|
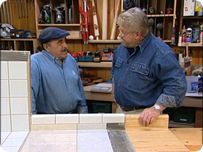 |
With this system, nearly any surface can be tiled over successfully. | |
 |
||
Ron Hazelton's HouseCalls is a National Home Improvement TV Show, please visit www.ronhazelton.com. |
||